Showing posts with label recipe. Show all posts

Monday, July 2, 2012

GFCF Pound Cake with Chocolate Ganache

I was on a quest over the weekend to find a new GFCF chocolate cake recipe. I remembered that I still had some fresh berries in the fridge. So, in my quest to make a cake with both chocolate and raspberries (2 of my favorite ingredients!), I came across a recipe from Gluten Free Easily that I knew I had to try. 

I’ve been dying to make a dairy-free chocolate ganache, and I knew this would be a perfect cake for it. I made a few tweaks to the pound cake recipe and gave it a shot. It came out pefect. OMG. Perfect. I wanted to eat it all by myself!
I swear to you that this cake does not taste gluten-free. At all. In fact, it tastes like a buttery, tender, moist, sweet, slightly vanilla madeleine cookie. It’s the best pound cake I have ever made, even from the days before we worried about wheat and butter. Now that’s saying something!  
I knew I couldn’t wait to share the recipe with you, my dear readers, so I’m up very late typing this up for you. I have a feeling you’ll be very glad I did!
The original recipe can be found here, but please note that the recipe I am including below reflects the changes I made to it. As an added bonus, I am also including my recipe for chocolate ganache so you have the option of serving the cake the way I did.  

GFCF Pound Cake

2  1/4 cups all-purpose gluten-free flour mix (I used Bob’s Red Mill brand)
1  1/2 tsp xanthan gum
1  1/4 tsp sea salt (I used pink Himalayan salt)
1  1/2 tsp baking powder, aluminum and gluten-free
3/4 cup sunflower oil (or safflower oil, melted coconut oil, etc.)
1  1/2 cups organic sugar (I sifted mine to make sure there were no clumps)
1 tbsp apple cider vinegar
1 tbsp applesauce
2 tsp gluten-free vanilla extract (I used my homemade extract I created with rum)
3 large organic eggs
2/3 cup full-fat organic coconut milk, whisked smooth (I used canned Thai Kitchen brand)

Preheat oven to 350 degrees. Combine dry ingredients in bowl and set aside.
In stand mixer bowl add oil and mix in sugar, vinegar, applesauce, and vanilla extract. Add eggs one at a time, stirring in-between. Add milk and mix 2 minutes. Gradually add dry ingredients and mix well.
Pour batter into greased loaf pans. Bake for 45-55 minutes or until golden brown and toothpick comes out clean.


The shiny glisten is the crunchy caramelization of the sugar.

You can see that it's airy and intact, and not super dense
and crumby like most GF cakes.


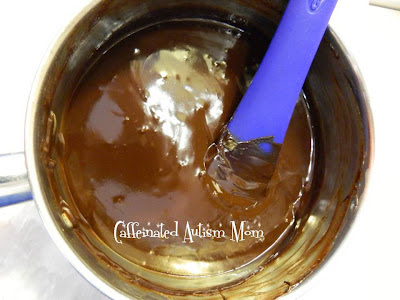
Dairy-Free Chocolate Ganache

This recipe is perfect for using up the rest of the coconut milk leftover from the can that you used for the pound cake recipe. It actually makes a little bit more than you need for the pound cake, but this just gives you a reason to go heavy on the chocolate ganache. And, that’s never a bad thing! If there’s anything leftover, you’ve got ganache for another treat. It will keep in the fridge, but I doubt it will be there long!

1 cup full-fat organic coconut milk         
2 cups (or slightly more!) semi-sweet chopped dairy-free chocolate or chocolate chips (such as Ener-G brand)
optional:  1/2 tsp gluten-free vanilla extract

In a small saucepan, whisk together the coconut milk and chocolate chips over low to medium low heat. Stir until the mixture is fully incorporated and the chocolate is melted, taking care to not scorch the chocolate. If you prefer, add in vanilla extract. The ganache will be smooth and shiny when done.

Pour the ganache over the cake and as it cools, it will firm up. Instead of pouring the ganache over the top of the cake, I opted to slice the cake and pour it over the individual slices. In our family, more chocolate is better!
Gorgeous, isn't it? It tastes as good as it looks!

Happy baking! Let me know how your pound cake and chocolate ganache turns out!

Thursday, February 23, 2012

GFCF Sugar Cookies with Vegan Icing

You may recall that I was having slight panic over what to make for the Valentine’s Day parties for my boys. I tried a new recipe in the 11th hour, which is always a huge risk with the GFCF diet. Guess what? The cookies were a huge hit! Since the boys have asked me to make them again, I figured I had better share the recipe with you!

First, I located a GFCF sugar cookie recipe at As Good As Gluten. Then, I found a vegan icing recipe at In My Vegan Life. I put the recipes together and came up with a wonderful and super tasty creation.
I am including both recipes for you here, with the modifications I made.

GFCF Sugar Cookies


1/2 CUP dairy-free butter (I used Earth Balance soy-free spread)
1 CUP organic granulated sugar
1 organic egg or egg substitute equivalent
1 TSP gluten-free vanilla extract
1 1/3 CUP gluten-free all purpose flour blend (I used Bob’s Red Mill brand)
1/2 TSP xanthan gum
1/2 TSP baking powder
1/2 TSP cream of tartar
1/2 TSP sea salt
organic powdered sugar for rolling cookie dough out
Directions:

In a stand mixer, cream together dairy-free butter and organic sugar until smooth. Add egg or egg substitute and gluten-free vanilla, mixing well. In a medium bowl, sift together gluten-free flour, xanthan gum, baking powder, cream of tartar and sea salt. While mixing on medium speed, gradually add dry ingredient mixture to creamed mixture. Chill dough in the fridge for at least 1 hour.
Preheat oven to 350 degrees. On a surface dusted with powdered sugar, roll chilled cookie dough out to about 1/4 to 1/2 inch thickness. Cut into desired shape. Place on a parchment covered cookie sheet. Bake for 10-12 minutes or until cookies are lightly browned on the edges. Let cool on the cookie sheet for 10 minutes then remove to a wire cooling rack.

Makes approximately 24 cookies.
This batch got a little overdone for my taste.
It made the cookies very crispy.

Vegan Icing
1 CUP organic powdered sugar
2-4 TBS coconut milk (or other preferred dairy-free milk)
1/2 TSP gluten-free vanilla extract
all natural red food coloring (I used Select brand, which is made from red beets)

sprinkles, if desired (I used Let's Do Sprinkelz brand)

Directions:
Combine all ingredients until smooth and spreadable. Add coloring until desired shade is achieved.

The icing will be quite runny. I mixed the icing in a shallow bowl and then dipped the cookie upside-down into it, twisting it back and forth for even coverage. Then I held the cookie for a few seconds over the bowl to allow the excess icing to drip off, immediately placing it right-side up onto a wire rack. I added sprinkles on top of the icing while it was still wet. Any remaining excess icing then dripped off the edges of the cookies and through the wire rack as the icing set. It took 30-60 minutes for the icing to harden to the touch enough for handling and stacking.

These cookies were not only pretty to look at, but they were a sweet treat without the worry of allergens or chemical ingredients. I highly recommend you give them a try! Let me know how they turn out.    


Tuesday, December 20, 2011

Product Review: The best GFCF dinner rolls ever!

I really mean that! The BEST ever. Do you have any idea how many different gluten-free recipes and brands I’ve used over the past several years? A lot! Do you know how many times extended family and friends have paid me fake compliments as they choke down the GFCF bread bricks that I serve fresh from my oven?

It usually starts out with me saying something like this:

“I tried another new gluten-free, casein-free, soy-free, egg-free, nut-free bread recipe! I hope it turned out okay!"
They reply back with something to the effect of:
“Well, for gluten-free they aren’t bad.”
Uh huh. Sure. Great way to dodge the fact that they taste like crumbly, heavy cardboard. I think I’ve only ever heard a truly positive remark once. It was in regard to a box mix I tried out last Christmas - Gluten Free Pantry’s french bread and pizza mix. It was decent enough. Generally speaking, we no longer go out of our way to eat bread because gluten-free varieties are always so disappointing.
But things are different now. I found the bread mix that puts all other gluten-free bread mixes to shame. I first tried it last month for Thanksgiving dinner with my parents. I made rolls again last night for an early Christmas dinner with my husband’s dad and his family. Do you want to know what the response was? It wasn’t the polite, “these rolls are better than the last ones you made” kind of remark. Oh no, indeed! We had entire conversations about how awesome these rolls were. The response was overwhelmingly positive! For Thanksgiving, we ate all the rolls in one sitting. No leftovers! That was a first! For our early Christmas dinner last night, I made a double-batch (anticipating a good response) and there were only a few left over. By golly…we have success!
I was introduced to this mix by my good friend, Granny Lala, an allergen-free baker. She is most definitely in the know! After she and I did some beta testing on some new sandwich rolls in her commercial kitchen one night, she was extremely generous and sent me home with a sample of this mix to try.
I know you’re dying to know what the brand is and where to get it. Are you ready? Go get a pencil.  

Monday, November 28, 2011

GF Alcohol and GF Vanilla Extract

I hope you had a wonderful Thanksgiving! Since we are now officially in the thick of the holiday season, if you’re anything like me, you are baking quite a bit. When I’m baking, vanilla is a very important ingredient. This time of year I use a lot of it, and boy is it expensive! Have you ever thought about whether or not your vanilla extract is gluten-free? Frankly that question wasn’t even on my radar until a couple of years ago.

One of my friends is an allergen-free baker who operates in a dedicated allergen-free commercial kitchen. At a bare minimum her products do not contain gluten, dairy, soy or nuts, but are also often free of other ingredients like eggs. I’ve had her come speak to my support group, I’ve attended one of her cooking classes, and I’ve also had the opportunity to work with her inside her kitchen. She is a wealth of information!
Regular vs. Gluten-Free Vanilla Extract
One of the things she taught me is that typical vanilla extract has gluten in it. She told me that alcohol in the extract usually comes from grains containing gluten, such as wheat. If it says alcohol (with no other explanation) on the bottle, then it probably has gluten in it. I hadn’t really thought about it before then. Most varieties available in your local grocery store contain grain alcohol, even if it doesn’t say “grain.” And, lots of the less expensive extracts don’t even contain real vanilla, but rather vanillin, an artificial flavor made from wood alcohol – a byproduct of the pulp industry. Yes…wood. Gross!
GF Alcohol Options
Rum
My friend explained how she sources her gluten-free vanilla extract from the Caribbean and has actually visited the factory where it is made using local rum. Did you know that rum is made from sugar cane? Almost all regular rum on the market is gluten-free, unless it is flavored or colored. Gluten can be a hidden ingredient in flavors and colors (like caramel color).   
Vodka and Tequila
I was already aware that vodka is made from potatoes, which makes it a grain-free alcohol alternative. However, what I didn’t know is that many vodka brands now use corn or grain alcohol in their recipe.
Another traditionally gluten-free alcohol is tequila, which is made from agave. Unfortunately, some of the cheaper tequila brands will add additional sugar or grain to their recipe.  
I found a list of gluten-free alcohols that you can reference here and here, although I have no idea how current or correct the information is. It never hurts to give the manufacturer a call to double-check if you are unsure.         
GF Vanilla Extract
Since my friend shared with me all about gluten-free alcohols, I thought that perhaps I should consider making my own vanilla extract. I didn’t think it would be very difficult and perhaps it would be less expensive!
And, now that we know about gluten-free alcohol options, we can make our GF vanilla extract! Want to know how easy it is?
Gather the following things:
1 cup of gluten-free alcohol of your choosing (i.e. rum, vodka, tequila, etc.)
3 vanilla beans
sealed container, like a glass mason jar
Here’s what to do:
1.     Split your vanilla beans with a knife, leaving them attached at one end.

2.     If you like, scrape the seeds out with the back of your knife and add them to the alcohol.

3.     Place the vanilla beans in the container, making sure they are covered with alcohol.

4.     Shake the container vigorously once a week.

5.     Store for at least 60 days in a dark place for best results.

6.     If you prefer, strain the seeds out of the extract using cheesecloth or a fine sieve before using.

7.     As you use the extract, top it off with additional gluten-free alcohol to replenish your supply. The vanilla beans will continue to flavor the alcohol for several years.
One of my 2 large bottles of rum.
I added the vanilla beans back in
September. Looking good!
It makes a perfect gift!
*Warning! If you are reading this and celebrate Christmas with my family, avert your eyes! The following information is top secret!*
This year I am making homemade gluten-free vanilla extract for our family and close friends. (I doubt any of those people actually read my blog, so I’m probably safe!)
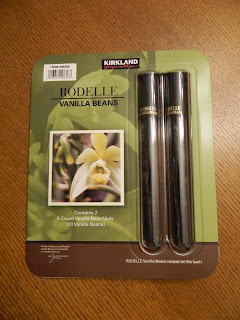
I purchased 2 large bottles of rum. Based upon the recipe above, I then calculated the number of vanilla beans I would need based upon the combined volume of the bottles of rum I planned to use. I bought vanilla beans at Costco because it was the cheapest place I could find them. The vanilla beans they carry are larger than most vanilla beans I had found previously, which made them an ever better deal. My experience with my local Costco store is that vanilla beans are only available during the holiday season. Then I found some pretty bottles at Cost Plus World Market with cork stoppers that will accommodate the vanilla beans standing upright.
Costco vanilla beans!
I will pour out the newly prepared vanilla extract into each bottle (which holds approximately 1 cup) and then place some vanilla beans inside. Since my vanilla beans are large, I plan to only include 2 per bottle rather than the 3 indicated in the recipe. I found some Avery labels that are intended for wine bottles and are moisture-resistant (to help protect against drips). I will design a custom label and then apply it to each bottle. Viola! Christmas gifts are done!
I’m sorry I didn’t think far enough ahead to share this with you at least 60 days prior to Christmas! If you choose to make your own gluten-free vanilla extract as gifts this year, just add a note to the recipient indicating that they will get the best results if they wait to use it until the date you specify (at least 60 days after you added the vanilla beans to the alcohol). Don’t forget to remind them that they can top it off and keep making their own as they use it up.
It’s the gift that keeps on giving!    
P.S. If you would like more information on making your own GF vanilla extract, I found 2 articles online that are really good - here and here.

Thursday, September 22, 2011

GFCF Hearty & Easy Potato Soup

If you know anything about me, I am always super busy. I absolutely enjoy cooking, but I love to find an easy way to do things, especially considering the food allergies we deal with in our family. Allergy-free cooking does not have to be hard, and you will think of me as a caffeinated version of Sandra Lee here in a minute.
Have you ever seen cooking segments on TV that talk about taking a premade or packaged food item and making it better? I’ve even seen a cookbook devoted to making wonderful things with a simple box of cake mix as the main ingredient. So, let’s think of how to translate this concept into a hearty and comforting dinner.
School is in session once again and fall is coming quickly. I’ve been in the mood for soup for the past few days and decided to make something easy at home to quench my desire for soup. I actually took my inspiration from the Zuppa Toscana soup at the Olive Garden. Are you familiar with this lovely soup of sausage, kale and potato? It is very satisfying and has a little kick to it.
So, this is my take on it. I’ve made this soup before using steak as the protein, which I actually think I prefer in flavor. But, here is the version I recently made that is more true to the inspiration. Plus, I have pictures! It’s very tasty and it’s an easy dinner. Let’s get started!

Tuesday, May 31, 2011

GFCF Lemon Garlic Chicken served with Lemon Dill Carrots

I recently made a delicious and easy meal consisting of 2 basic ingredients we regularly keep in our fridge: chicken and carrots. I’ve made this dish many times before, but have never taken the time to write down how I did it. I’m one of those pinch-of-this and a dash-of-that kind of gals. Most days I don’t really think about measurements and I just go with my gut. Generally things turn out pretty well, but there have definitely been times where my husband and kids turned up their noses at a few of my creative dining experiments!
This particular dinner is one we do fairly regularly with a few modifications here and there. I thought it would be good to share, so I wrote things down as cooked and I even managed to take a few pictures in the process. All this for you, my dear readers! I hope you enjoy this simple anytime dinner!    

GFCF Lemon Garlic Chicken
1 tbsp organic coconut oil (or olive oil, etc.)
2 cloves minced or finely chopped garlic (add more if you prefer a stronger garlic taste)
1 pound organic, free range chicken (we used thighs)
Pinch of dill and sage
Sea salt and pepper to taste
¼ to ½ cup white wine (or chicken stock)
Juice from ½ to 1 lemon (depending on size of lemon and how much you want to taste it)
In a large sauté pan, heat up the coconut oil and add the garlic. When the pan is hot and the garlic is caramelized, add chicken pieces and spices. Cook on medium high heat until the chicken has a nice color on both sides. Reduce heat to medium, add wine, cover and cook chicken. When chicken is almost fully cooked (as determined by a meat thermometer), uncover and simmer, reducing sauce if needed. Just before the chicken is ready, add the lemon juice, stir and cook for 1-2 minutes.
GFCF Lemon Dill Carrots
6 medium organic carrots, sliced
1 tbsp organic coconut oil (or olive oil, etc.)
2 splashes white wine (or chicken stock)
Pinch of dill
Sea salt and pepper to taste
Dash of ground ginger (a little goes a long way, or use approximately ¼ tsp freshly grated ginger)
1 overflowing tbsp raw honey
Juice from ½ lemon
In a small/medium sauté pan, heat up the coconut oil and carrots to medium heat. Stir and after a couple of minutes, add the wine and spices. Cover and simmer until carrots start to become tender. Uncover to reduce sauce, add honey and mix thoroughly. Right before the carrots are cooked perfectly, add the lemon juice, stir and cook for 1-2 minutes.
Plate the carrots, spooning a little of the lemon dill sauce from the pan over the top of the carrots. Add chicken to the top of the carrots and drizzle some of the garlic lemon sauce from the pan over the top of the chicken.
Add a cheese crouton for a little crunch, if you like (as pictured above). Stay tuned...I will post the directions on how to make a sheep’s milk pecorino romano cheese crouton very soon.
The chicken and carrots complement each other very well, and you will find that everything tastes light and fresh, yet very flavorful. This is an easy, simple and delicious dinner that everyone will enjoy.

Prince Charming
Monkey


Monday, May 23, 2011

GFCF Uninspired Skillet Dinner

Do you ever have those nights when you have absolutely no idea what to make for dinner? I do! In fact, the last time this happened was only a few days ago. Luckily, I had managed to pull some protein out of the freezer to thaw, but I had no idea what to make with it. I took a quick look in my fridge and saw several kinds of veggies, but nothing was speaking to me. I was uninspired. I had 1 pound of meat and no clue what to do with it. Some of my veggies were getting close to being too old to use, so I knew I wanted to try to incorporate them into the meal. I decided to throw everything into a skillet and see what happened. I knew it could easily be a catastrophic failure of epic proportions, but we had to eat!
I will admit that in the back of my mind I had serious reservations about what I was doing. It didn’t sound all that appetizing, but it was dinner made with fresh, whole, healthy, organic ingredients. Well, I was shocked when it turned out great! I think we all were surprised. In fact, my husband has asked me to remember how I made it so that I can replicate it sometime soon. Miss C was over for dinner that night and she helped herself to a second portion (which almost never happens). Titan and I also indulged in seconds, and my kids even ate it! Yahoo!
The best way I know how to remember a recipe these days is to post it here on this handy-dandy blog of mine. That way you (my wonderful readers!) get the fabulous, tried-and-true recipe, and I have the benefit of not forgetting how I made it when I am a victim of brain drain and exhaustion.  

It's not the prettiest or most elegant
meal, but it sure was tasty!

Basic Ingredients of the Uninspired Skillet Dinner:


1 pound protein (hamburger, ground turkey, diced chicken, or other protein)
Vegetables (whatever is in your fridge or freezer)
1 can organic tomato sauce
Salt, pepper, and other spices to taste


Here are the ingredients I used:
1 pound organic ground beef
1 leek, diced
1 onion, diced
3 cloves garlic, diced
1 small head of organic cabbage, cut into small pieces
8 small organic potatoes, peeled and diced
1 can organic tomato sauce
Salt and pepper to taste
Dash of each: oregano, basil, thyme, garlic powder, cumin, paprika
In an oiled skillet, season and brown ground beef (or other protein). Saute onions, leek and garlic (or other aromatics) in skillet. Add in potatoes and cabbage (or other vegetables). Stir in can of tomato sauce and add spices to taste. Cover and simmer, stirring occasionally, until potatoes are tender.
There’s probably a million ways to make this dish. Try my version or make up your own and then share your success story in the comments for all of us to enjoy. I hope you now have a little bit of dinner inspiration for those uninspiring nights.  

Thursday, May 5, 2011

GF Pasta Casserole

The other night I wasn’t feeling particularly inspired when it came time to decide what to make for dinner. I figured that it would be yet another spaghetti night. My husband decided that he wanted to try something different. I welcomed his enthusiasm and gave him a few minutes to figure out an alternate plan. He went online and found a basic cheese sauce recipe and then I tweaked it to meet our needs. His idea turned into a really wonderful dinner.

Keep in mind that this recipe is not completely dairy-free in the way we made it, but substitutions are easily made. We have found that our kids don’t tolerate goat’s milk but we have had some success with sheep’s milk cheese. As a result, we keep various forms of sheep’s milk cheese on-hand in our fridge for occasional use. We typically buy our sheep’s milk cheese at Trader Joe’s and we can get feta, pecorino romano, Shepherd’s cheese, and sometimes we can even find gouda.
It's a good idea to always have GF bread crumbs on-hand. We keep a supply in the freezer in a marked resealable bag. I make bread crumbs by taking the heels of a GF loaf (or the leftovers from a GF brand the kids didn't like) and cutting them into cubes. I slowly toast the cubes on a cookie sheet in the oven at 300 degrees until they are dried into croutons. I place the croutons into the food processor and pulse until I they have a coarse meal consistency.
*We found that there was more cheese sauce than we needed for only one box of pasta. There was actually enough sauce for 2 boxes of pasta! We opted to only prepare one box of pasta and save half the cheese sauce to use another day.
GF Pasta Casserole
1 box (8 oz) GF rice penne pasta or other pasta variety of your choosing (*see note)
2 cups dairy-free shredded cheese (Daiya brand, etc. – we used Trader Joe’s sheep’s milk Shepherd’s cheese)
½ cup grated hard cheese (we used sheep’s milk pecorino romano)
3 cups dairy-free milk (we used coconut milk)
¼ cup dairy-free soy-free margarine (we used Earth Balance)
2 ½ tbs all-purpose GF flour (we used Bob’s Red Mill)
1 pound organic hamburger
1 cup frozen organic peas
½ cup toasted GF bread crumbs
pinch of paprika (we used a dash of red pepper and a pinch of cumin)

Cook pasta and drain. Add frozen peas and stir lightly to cover the peas with the warm pasta.
Cook hamburger in skillet. Remove from heat and set aside.
In a saucepan, melt margarine over medium heat.
Whisk in flour to make a roux. Add milk to roux slowly, stirring constantly.
Stir in cheeses and cook over low heat until cheese is melted and fairly thick in consistency.
Put pasta and hamburger in a large casserole dish and pour cheese sauce over pasta. Stir gently to coat the pasta.
Sprinkle bread crumbs over the pasta mixture evenly, adding the paprika on top.
Bake at 350 degrees for 30 minutes until the bread crumbs are nicely browned.

Wednesday, March 9, 2011

GFCF Pumpkin Pancakes

Do you ever go through phases with food where you get stuck on one ingredient and use it a lot? Well, I’ve been doing that with pumpkin. When I was trying to come up with an idea for dinner the other night, my husband suggested we have breakfast. That’s when it hit me. Pumpkin pancakes! We hadn’t had any for quite some time and I knew they would be a guaranteed hit with the boys. So, my hubby got bacon duty and I made pumpkin pancakes. I also added 2 secret ingredients…unsweetened coconut and chocolate chips. No syrup or any other sweetener is required and the kids couldn’t stop eating them.
The following is based off of the Pumpkin Waffles recipe from Karina, the Gluten-Free Goddess. One of the changes I made was to the quantity of pumpkin. I didn’t want to only use a partial can, so I amended the recipe to use an entire can. I tweaked the dry ingredients and I also made a few substitutions from her original recipe. In all, I think they turned out well. You know you have succeeded when the kids devour them faster than you can make them!

Thursday, February 24, 2011

GFCF Pumpkin Chocolate Chip Muffins

What do I like to do on a cold, snowy day? Bake! One of our family’s favorite allergy-free treats is a recipe I adapted from an awesome gluten-free blogger, Karina the Gluten-Free Goddess. I have made this recipe countless times and each time it’s absolute perfection. These are some of the best muffins I have ever made, and you honestly cannot tell that they are free of gluten, egg, dairy, soy, and nuts.
The original recipe for Banana Chocolate Chip Bread that inspired these muffins is from Karina’s KitchenHer allergy-free recipes are always wonderful and she’s got some great ones for these cold, winter days.   

Here’s the recipe, as I prepare it:

Saturday, February 19, 2011

Quick and Comforting: GFCF Chicken Alfredo Macaroni

Last night I needed a quick dinner that I knew everyone would eat. I had chicken thawed in the fridge and I didn’t want to make anything overly complex. I really wanted comfort food! So, with a few simple ingredients and about 20 minutes of time, we had a hearty and delicious dinner that everyone ate with gusto.
Keep in mind, you can change things up with whatever you’ve got laying around the house.
GFCF Chicken Alfredo Macaroni
1 pound diced organic, free range chicken (or other protein of your choice)
1 box (8 oz) of GF Ancient Quinoa Harvest macaroni pasta (or other GF brand/style of your choice)
1 to 2 cups (½ to 1, 8 oz package) Daiya mozzarella style shreds – dairy/soy/gluten free
½ to 1 cup frozen organic peas
½ cup sliced mushrooms (not shown in the picture)
½ to 1 ½ cups organic free range chicken broth (I used approximately 1 cup to thin cheese sauce)  
1 to 2 tbsp organic olive oil
spices to taste (I used sea salt, pepper, poultry seasoning, onion flakes, garlic powder)
Try adding other spices and veggies, or changing up the quantities to make it exactly how you and your family like it. If your child can tolerate cheese made from goat’s milk, sheep’s milk, or raw cow’s milk, feel free to experiment. Since my boys can handle cheese made from sheep’s milk, I love adding around ½ to ¾ cup of feta to give it an extra creamy texture and lovely flavor.

Now, let’s get started!

Related Posts Plugin for WordPress, Blogger...